Author: Emma

  • Mounting Yakima Round Cross Bars On 4Runner – A Storage Roof on 4Runner!

    Mounting Yakima Round Cross Bars On 4Runner – A Storage Roof on 4Runner!

    Mounting Yakima round cross bars on my 4Runner was easy and quick. The setup was straightforward, and the bars have been perfect for carrying bikes and extra gear. They’ve added great versatility to my vehicle and made trips more convenient. Highly recommend for anyone needing extra storage!

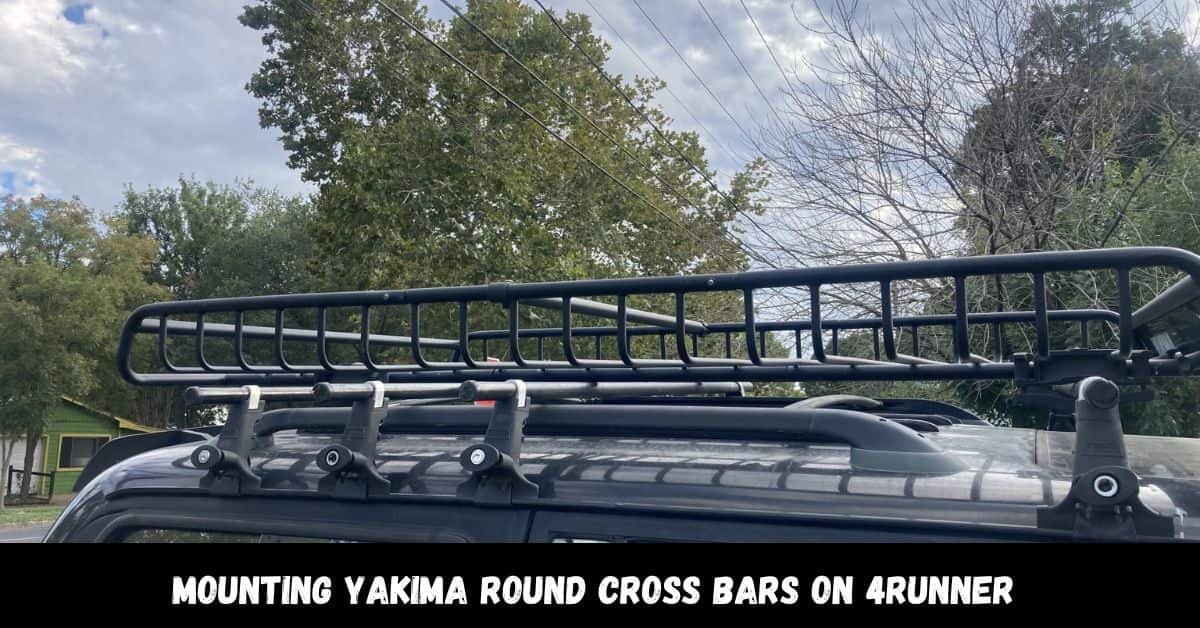
    Mounting Yakima round cross bars on a 4Runner adds versatile storage options for transporting gear like bikes, cargo, and skis. The installation is straightforward and provides a secure platform for various accessories, enhancing your vehicle’s functionality.

    What is Mounting Yakima Round Cross Bars on a 4Runner?

    Mounting Yakima round cross bars on a 4Runner involves installing a set of cylindrical roof bars onto your vehicle’s roof. These cross bars provide a sturdy platform for carrying various types of gear and accessories. Here’s a simple breakdown:

    Yakima Round Cross Bars:

    • Description: Yakima round cross bars are metal bars that run across the roof of your 4Runner. They are cylindrical in shape, which makes them easy to use with a range of accessories.
    • Purpose: The main purpose of these cross bars is to create a base for transporting things like bikes, luggage, or skis. They add extra storage space to your vehicle.

    What Are Yakima Round Cross Bars?

    Yakima round cross bars are roof rack components designed to carry various types of gear on your vehicle. They are cylindrical and made to be mounted on the roof of your Toyota 4Runner. They offer a versatile platform for attaching accessories like bike racks, cargo carriers, and ski racks.

    Materials:

    These cross bars are typically made from strong, lightweight materials such as aluminum or steel. They are coated to resist rust and corrosion, ensuring they remain durable even in harsh weather conditions.

    Why Choose Yakima Round Cross Bars?

    Versatility:

    Yakima round cross bars are highly versatile. Their round shape allows for easy attachment of a wide range of accessories, including bike racks, cargo boxes, and kayak carriers. This flexibility makes them a great choice for different activities and needs.

    Durability:

    These cross bars are built to last. The materials used are chosen for their strength and resistance to wear and tear. Whether you’re driving through rain, snow, or sun, these cross bars are designed to handle the elements and heavy loads.

    Adjustability:

    One of the key benefits of Yakima round cross bars is their adjustability. You can easily slide the bars along the roof of your 4Runner to find the best position for your gear. This adjustability ensures that you can customize the setup according to your specific needs.

    How to Install and Mounting Yakima Round Cross Bars on a 4Runner?

    Preparation:

    Before you start, gather the following tools and materials:

    • Tools: Wrench, screwdriver, and possibly an Allen key.
    • Materials: Mounting hardware provided by Yakima.

    Installation Steps:

    • Attach Base Feet: Secure the base feet of the cross bars to your 4Runner’s roof rails or tracks. Follow the instructions provided by Yakima to ensure a secure fit.
    • Position the Cross Bars: Place the round cross bars onto the installed base feet. Adjust them to your preferred location along the roof.
    • Secure the Cross Bars: Tighten the cross bars onto the base feet using the provided hardware. Make sure everything is fastened tightly to prevent movement.

    Securing the Cross Bars:

    After installation, check all connections to ensure they are tight and stable. Make sure the cross bars are aligned properly and do not wobble.

    Which Accessories Can Be Used with Yakima Round Cross Bars?

    You can use a variety of accessories with Yakima round cross bars, including:

    • Bike Racks
    • Cargo Carriers
    • Ski Racks
    • Kayak Carriers
    • Roof Bags
    • Surfboard Racks
    • Snowboard Racks
    • Fishing Rod Holders
    • Ladder Racks
    • Bike Locking Systems
    • Fishing Gear Carriers
    • Camping Gear Holders

    Compatibility:

    Ensure that the accessories you choose are compatible with round cross bars. Yakima provides a range of accessories specifically designed for their round bar system. Check compatibility before purchasing.

    Benefits:

    • Increased Storage: By adding cross bars, you gain additional space for carrying gear, making your trips more convenient.
    • Versatility: The round design of the bars allows you to use various accessories, such as bike racks, cargo carriers, and ski racks.

    Where to Buy Yakima Round Cross Bars for a 4Runner

    Retailers:

    You can purchase Yakima round cross bars from various retailers, including:

    • Online Stores: Websites like Amazon, Yakima’s official site, or auto accessory retailers.
    • In-Store: Automotive stores, outdoor gear shops, or major retailers with an automotive section.

    Price Range:

    The cost of Yakima round cross bars can vary based on the model and any included features. Generally, expect to pay between $100 and $200. Prices may vary depending on the retailer and any sales or promotions.

    Frequently Asked Questions:

    Can I install Yakima round cross bars on any 4Runner model?

    Yes, Yakima round cross bars can be installed on most Toyota 4Runner models, but it’s important to check compatibility with your specific model year and roof configuration.

    Do I need special tools to install the cross bars?

    You will need basic tools like a wrench and screwdriver. Some models might require an Allen key or other specific tools, which should be included in the installation kit.

    How much weight can the Yakima round cross bars hold?

    The weight capacity depends on the specific model of the cross bars and your 4Runner’s roof load rating. Typically, they can handle up to 165 pounds (75 kg), but always check the manufacturer’s specifications.

    Can I leave the cross bars on my 4Runner all the time?

    Yes, you can leave them on your vehicle, but it’s a good idea to remove them if you don’t plan to use them for a long period to reduce wind resistance and potential noise.

    Will Yakima round cross bars affect my vehicle’s fuel efficiency?

    Having cross bars installed can slightly affect fuel efficiency due to increased wind resistance. However, the impact is generally minimal.

    How do I maintain and clean my Yakima round cross bars?

    Regularly clean the cross bars with mild soap and water to remove dirt and debris. Check the hardware periodically to ensure everything is tight and in good condition.

    Can I use Yakima round cross bars with other brands of accessories?

    Many accessories from other brands can be used with Yakima round cross bars, but ensure they are compatible with the round bar design.

    What should I do if I lose a part of the mounting hardware?

    Contact Yakima customer service or the retailer where you purchased the cross bars. They can provide replacement parts or help you find a solution.

    Can I install Yakima round cross bars myself, or should I have a professional do it?

    You can install them yourself using the provided instructions, but if you’re unsure or uncomfortable, having a professional installer handle it can ensure a proper fit.

    Are Yakima round cross bars covered by a warranty?

    Yes, Yakima round cross bars typically come with a warranty. Check the warranty details provided by Yakima for information on coverage and duration.

    Also Read: 2011 Toyota 4Runner Right Rear Brake Light Keeps Going Out – A Complete Guide!

    Conclusion:

    Mounting Yakima round cross bars on your 4Runner is a great way to expand your vehicle’s storage and transport various gear easily. With their versatility and durability, these cross bars can handle everything from bikes to skis. Whether you’re planning an adventure or need extra cargo space, Yakima round cross bars offer a practical solution. Just follow the installation steps, choose the right accessories, and you’ll be set for your next journey.

  • 1st Gen 4Runner Hood Stuck Shut – The Reason!

    1st Gen 4Runner Hood Stuck Shut – The Reason!

     once had my 1st Gen 4Runner hood stuck shut and couldn’t figure out why. After cleaning and lubricating the latch, it opened right up. Now, I keep it maintained to avoid future issues.

    1st Gen 4Runner Hood Stuck Shut, it’s likely due to a broken release cable, misaligned latch, or dirt buildup. To fix it, you can try lubricating the latch, adjusting the hood alignment, or manually releasing the latch with a tool. Regular maintenance, like cleaning and lubricating the hood latch, can prevent this issue from happening again.

    What is 1st Gen 4Runner Hood?

    The hood on a 1st generation Toyota 4Runner (1984–1989) is the large metal panel at the front of the vehicle that covers the engine and its components. It’s designed to keep dust, water, and debris out of the engine bay while also allowing easy access for repairs and maintenance. The hood is usually opened using a release handle inside the vehicle, and it locks securely with a latch to stay closed when the vehicle is in motion.

    How Does 1st Gen 4Runner Hood Work?

    The 1st gen 4Runner hood operates through a mechanical system. Inside the cabin, there’s a release handle usually located near the driver’s side footwell. When you pull this handle, a cable connected to it pulls on the latch mechanism under the hood. This partially opens the hood, but to fully release it, you must reach under the front of the hood to release the secondary safety latch. This double-latch system ensures the hood stays secure when driving, but it can also become problematic if the system fails or gets stuck.

    How Do You Open a Stuck Closed Hood?

    If your hood is stuck closed, here are the steps you can try:

    Try the Release Handle: 

    Start by pulling the hood release handle inside the car. You should hear a click or feel resistance. If you don’t, the cable might be disconnected or broken.

    Push Down on the Hood: 

    While pulling the release handle, press down on the hood with your hands. This might help free a stuck latch.

    Use a Long Tool: 

    If the hood won’t open, try using a long tool like a flathead screwdriver to manually trip the latch by reaching through the grille.

    Access the Latch from Underneath: 

    If nothing works, crawl under the car and use a flashlight to locate the latch. You can then manually release it using pliers or a long tool.

    What is the Problem with the 1st Gen 4Runner Hood?

    The main issue with a stuck 1st gen 4Runner hood is usually related to the hood latch or release cable. Over time, rust and dirt can accumulate in the latch mechanism, making it hard to move. Alternatively, the cable that connects the release handle to the latch might stretch, snap, or become disconnected, preventing it from pulling the latch properly. In some cases, damage to the latch from an accident or misalignment can also cause the hood to stay stuck.

    Why Does the Hood Get Stuck?

    • Rust and Corrosion: If the vehicle has been exposed to wet or salty conditions over time, the metal latch and hinges can rust, making it difficult or impossible for the latch to release.
    • Stretched or Broken Cable: The release cable can wear out over time, causing it to stretch or snap. If the cable is too loose, it won’t pull the latch far enough to release the hood.
    • Debris and Dirt: Dirt, mud, and road grime can build up in the latch mechanism, clogging it and preventing it from moving smoothly. Regular cleaning and lubrication are important to avoid this.
    • Latch Misalignment: If the latch is misaligned, it may not open properly, even if the release cable works. This can happen if the hood or front of the vehicle has been damaged.

    How to Fix a Stuck Hood?

    Lubricate the Latch: 

    Spray a penetrating lubricant (like WD-40) onto the latch mechanism and around the cable connections. This can help loosen rust or dirt.

    Pull the Cable with Pliers: 

    If the release handle inside the car doesn’t work, use pliers to manually pull the cable where it connects to the latch. Be careful not to break the cable further.

    Tap with a Rubber Mallet: 

    Use a rubber mallet to gently tap the area around the latch. This might help free up the mechanism if it’s just stuck.

    Access from Below: 

    If the hood still won’t open, you may need to get under the vehicle. Look for a way to reach the latch through the grille or under the bumper and manually release it. If you can’t get it open yourself, you may need to go to a mechanic for help.

    Which Tools Are Needed for the Repair?

    • Penetrating Lubricant (like WD-40): This helps loosen rust, corrosion, and dirt around the latch.
    • Pliers: Use these to pull the release cable directly if the handle inside the vehicle doesn’t work.
    • Rubber Mallet: A rubber mallet is useful for gently tapping around the latch without damaging the hood or latch.
    • Screwdriver/Socket Wrench: If you need to remove parts to access the latch from below, having basic hand tools like a screwdriver or socket wrench can help.

    How to Open a Toyota 4Runner Hood from the Outside?

    Feel for the Latch: 

    Slide your fingers under the front edge of the hood and feel for the safety latch. This is usually located slightly off-center and can be pushed to release the hood.

    Use a Long Tool: 

    If you can’t find the latch by feel, use a long, thin tool (like a screwdriver) to push the safety latch through the grille.

    Manually Release the Latch: 

    If the latch is jammed, you can reach through the grille with a tool to trip the main latch.

    How to Open a Hood with a Broken Latch?

    If the latch itself is broken, you’ll need to access it manually:

    Pull the Cable with Pliers: 

    Use pliers to pull the release cable directly. This might allow you to open the hood if the cable is still intact.

    Reach the Latch from Below: 

    If pulling the cable doesn’t work, try reaching under the vehicle and manually triggering the latch. You may need to remove the front bumper or grille for better access.

    Seek Professional Help: 

    If the latch is completely broken, it’s best to take the vehicle to a mechanic to avoid further damage.

    How Do You Fix a Hood Latch That Won’t Close?

    If the hood of your 1st Gen 4Runner won’t stay closed, the problem might lie in the latch mechanism. Here’s how you can fix it:

    Clean the Latch: 

    Dirt and debris can build up in the latch, preventing it from fully engaging. Use a clean cloth and a small brush to remove any dirt, grime, or rust from the latch mechanism.

    Lubricate the Latch: 

    Apply a penetrating lubricant, such as WD-40, to the latch. This can help loosen any stuck parts and make sure the latch moves freely.

    Check for Alignment: 

    If the hood is misaligned, it may not engage with the latch properly. Close the hood slowly and check if the latch and striker (the part on the hood that connects with the latch) are lined up. If not, you might need to adjust the latch or hood position slightly to ensure proper closure.

    Inspect the Latch Mechanism: 

    If cleaning and lubricating don’t work, the latch itself may be broken or worn out. Inspect it for any damage, like bent parts or broken springs, and replace the latch if necessary.

    Adjust the Hood Release Cable: 

    If the release cable is too tight or too loose, it can prevent the latch from engaging correctly. Check the tension of the cable and adjust or replace it if needed.

    Why Won’t the Hood of My Car Open?

    If the hood of your car won’t open, several common issues could be causing the problem:

    Broken or Stretched Release Cable: 

    The most common reason for a hood not opening is a broken or stretched release cable. Over time, the cable can wear out, making it difficult to pull or causing it to snap. If the cable is broken, it won’t activate the latch to release the hood.

    Jammed or Rusted Latch: 

    Rust, dirt, or debris can clog the latch mechanism, making it difficult or impossible for the latch to move. If the latch is stuck, it won’t release the hood, even if the cable is working properly.

    Misaligned Hood or Latch: 

    If the hood or latch is misaligned due to an accident or wear, the hood may get stuck. In such cases, even pulling the release handle might not open the hood.

    Faulty Secondary Latch: 

    The secondary safety latch, which prevents the hood from flying open if the primary latch fails, might be stuck or jammed. If this secondary latch doesn’t release, the hood won’t open, even if the primary latch is working.

    Frozen Components: 

    In colder climates, moisture can freeze around the latch or cable, making it difficult to open the hood. Gently warming the area with a hairdryer or using de-icing sprays can help in this situation.

    FAQS About Toyota 4runner Hood Stuck Shut:

    Can I open the 1st Gen 4Runner hood if the cable is broken?

    Yes, even if the release cable is broken, you can still open the hood. You’ll need to reach under the car or through the front grille and use a long tool, like pliers or a screwdriver, to unlock the latch by hand.

    What should I do if the hood won’t stay open after unlocking it?

    If the hood won’t stay up, the problem might be with the rod that holds it open or the gas struts (if you have them). Check if the rod is bent, and if your 4Runner has gas struts, you might need to replace them if they’ve worn out.

    Can I use regular oil to fix a stuck hood latch?

    While you can use regular oil, it’s better to use a spray like WD-40 or silicone spray. These work better to clean and loosen parts, and they won’t collect as much dirt as regular oil does.

    How often should I lubricate the hood latch to stop it from getting stuck?

    It’s smart to spray some lubricant on the hood latch once a year, especially if you live where it rains a lot or snows. This helps stop rust and dirt from causing problems.

    Can a misaligned hood stop the latch from working?

    Yes, if the hood is not lined up right, it can make the latch hard to close or open. This might happen after a small accident or if the hood wasn’t set properly. You may need to adjust how the hood fits or tweak the latch to fix this.

    Conclusion:

    If the hood of your 1st Gen 4Runner is stuck shut, it’s usually due to common issues like a broken cable, misaligned latch, or dirt buildup. Regular maintenance like cleaning and lubricating the latch can prevent these problems. If the hood won’t open or close properly, following simple steps can help you fix it easily. By keeping the hood latch clean and well-maintained, you can avoid future issues and keep your 4Runner running smoothly.

    Also Read: What Electronics Are Involved 2011 Toyota 4Runner Brake Lights?

  • 2011 Toyota 4Runner Can Dealer Diagnose Brake Light Problem Fast?

    2011 Toyota 4Runner Can Dealer Diagnose Brake Light Problem Fast?

    2011 Toyota 4Runner Can Dealer Diagnose Brake Light Problem Fast? When my 2011 Toyota 4Runner had a brake light issue, I took it to the dealer, and they diagnosed it quickly. The technician found a blown fuse, replaced it within minutes, and had me back on the road fast. Their expertise and efficient service made the experience hassle-free.

    If your 2011 Toyota 4Runner has a brake light problem, it could be due to a blown fuse, burned-out bulb, or faulty brake light switch. A quick check or a visit to the dealer can diagnose and fix the issue, ensuring your vehicle stays safe on the road.

    This article is your go-to help to Diagnose Brake Light Problems and Steps to Take for resolving Brake Light Problems.

    What Are Common Brake Light Problems?

    Faulty Brake Light Switch:

    The brake light switch is located near the brake pedal. If it fails, your brake lights might not turn on when you press the pedal. This is a common issue that can be checked and replaced easily.

    Blown Fuse:

    A fuse controls the electrical circuit for the brake lights. If the fuse is blown, the brake lights will stop working. Checking and replacing a fuse is a quick fix.

    Burned-Out Bulbs:

    Sometimes, the brake light bulbs themselves can burn out. This is a simple problem that usually requires just a bulb replacement.

    Wiring Issues:

    Wiring problems, such as frayed or disconnected wires, can prevent brake lights from functioning. This issue might need a more thorough inspection to locate and fix.

    ABS System Problems:

    If there are issues with the Anti-lock Braking System (ABS), it could affect the brake light. This is less common but may require a detailed diagnostic.

    Steps to Take When the Check Engine Light Illuminates:

    When your check engine light turns on, it might seem alarming, but don’t panic. This light is designed to alert you about potential issues, but your car can still function. Here’s what you should do:

    Check the Gas Cap: 

    A loose or faulty gas cap is the most common reason for this light to turn on. Make sure your gas cap is tightly secured. If it looks damaged, replace it.

    Look for Other Issues: 

    If the gas cap seems fine, the problem could be something more complex, like a faulty ignition coil, a failing catalytic converter, or worn-out spark plugs. These issues are not immediately critical, but they need professional attention.

    Visit a Technician: 

    Since diagnosing these problems requires specialized equipment, it’s best to have your car checked by a qualified Toyota technician. They will be able to identify the exact issue and recommend the necessary repairs.

    Actions to Take When the Tire Pressure Light Comes On:

    Seeing the tire pressure light can be unsettling, but it doesn’t always mean you have a flat tire. Here’s how to handle it:

    Check Tire Pressure: 

    This light indicates that one or more of your tires may have low air pressure. If your car has a full-size spare, make sure to check its pressure as well. Use a tire pressure gauge or visit a gas station to check and adjust the pressure.

    Look for Visible Issues: 

    If you notice a flat tire or an unusual bounce while driving, you’ll need to change the tire. After replacing the tire, have the damaged one inspected by a technician for possible repair or replacement.

    Consider Temperature Changes: 

    Rapid temperature changes can cause tire pressure fluctuations. If the light remains on after adjusting the pressure, there might be a small leak or another issue. Have a professional inspect your tires to ensure they are in good condition.

    What to Do When the Maintenance Required Light Appears?

    The maintenance required light is a reminder that it’s time for routine service. Here’s what you need to do:

    Schedule Service: 

    This light typically turns on every 5,000 miles to remind you of scheduled maintenance, such as an oil change or filter replacement. Contact your Toyota dealership to book a service appointment.

    Reset the Light: 

    After your service is completed, the maintenance required light will be reset by the technician. This ensures that it will only come on when it’s time for the next service.

    How to Get Professional Help with Toyota Dashboard Warning Lights

    If you encounter any dashboard warning lights and need assistance, our expert technicians at Towne Toyota in Ledgewood, New Jersey are here to help. We specialize in diagnosing and resolving issues with Toyota vehicles, including models like the Toyota Camry, Corolla, C-HR, and Prius. Schedule an appointment with us today to ensure your car is in top condition and all warning lights are addressed promptly.

    When Should You Get a Dealer Diagnosis?

    Immediate Symptoms:

    If you notice that your brake lights aren’t working or behaving erratically, it’s a good idea to have it checked out right away. Immediate diagnosis can prevent safety issues.

    Persistent Issues:

    If you’ve replaced bulbs or fuses and the brake light problem persists, it’s time to visit a dealer. Persistent issues often require professional inspection.

    After DIY Fixes Fail:

    If you’ve attempted to fix the problem yourself and it hasn’t worked, a dealer can offer a more precise diagnosis and repair.

    Why Choose a Dealer for Diagnosis?

    Expert Knowledge:

    Dealers have trained technicians who specialize in Toyota vehicles. They understand the specific issues that might arise with a 2011 Toyota 4Runner.

    Access to OEM Parts:

    Dealers can provide original equipment manufacturer (OEM) parts if replacements are needed. OEM parts are designed to fit perfectly and work reliably.

    Warranty and Service Records:

    If your vehicle is still under warranty, having the dealer perform repairs ensures that your warranty remains intact. They also keep detailed service records.

    How Fast Can a Dealer Diagnose the Problem?

    Quick Inspection for Simple Issues:

    For straightforward issues like a blown fuse or burned-out bulb, the dealer can provide a diagnosis quickly, often within the same day.

    In-Depth Diagnosis for Complex Problems:

    For more complicated problems, such as wiring issues or ABS system malfunctions, the diagnosis may take longer. Dealers will use advanced tools to pinpoint the exact problem.

    Which Steps Will a Dealer Take?

    Initial Check:

    The dealer will start with a visual inspection of the brake light system to identify obvious issues, like burned-out bulbs or blown fuses.

    Diagnostic Scan:

    Using diagnostic tools, the dealer will scan for error codes or electronic issues that could be affecting the brake lights.

    Component Testing:

    The dealer will test individual components, such as the brake light switch and wiring, to ensure everything is functioning correctly.

    Frequently Asked Questions:

    Can a Brake Light Problem Affect the Vehicle’s Safety Systems?

    Yes, a malfunctioning brake light can impact safety systems, such as the cruise control or traction control, as these systems rely on proper brake light function to operate correctly.

    How Much Does It Typically Cost to Fix a Brake Light Issue on a 2011 Toyota 4Runner?

    The cost can vary depending on the specific problem. Simple fixes like replacing a bulb or fuse might cost under $50, while more complex issues like wiring repairs could be more expensive, ranging from $100 to $300 or more.

    Is It Safe to Drive with a Brake Light Issue?

    It’s not recommended to drive with a brake light problem, as it can be dangerous. Other drivers won’t be aware when you’re braking, which increases the risk of rear-end collisions.

    Can I Use Aftermarket Parts to Fix the Brake Light Issue?

    While aftermarket parts might be less expensive, using OEM parts from a dealer is generally recommended for reliability and compatibility with your 2011 Toyota 4Runner.

    How Often Should Brake Lights Be Checked or Replaced?

    Brake lights should be checked regularly, especially during routine maintenance. Bulbs generally last a few years, but it’s important to inspect them periodically to ensure they’re functioning properly.

    Also Read: Gen 3 4Runner IAC Valve – An Essential Component of Engine!

    Conclusion:

    If you’re facing brake light issues with your 2011 Toyota 4Runner, visiting a dealer is a smart move. They can quickly diagnose and fix the problem, whether it’s a simple bulb replacement or a more complex wiring issue. With expert knowledge, the right tools, and access to original parts, dealers ensure your brake lights are working safely and reliably, keeping you and others on the road secure.

  • What Electronics Are Involved 2011 Toyota 4Runner Brake Lights?

    What Electronics Are Involved 2011 Toyota 4Runner Brake Lights?

    The brake lights in a 2011 Toyota 4Runner depend on several electronic parts to work properly. These components include the brake light switch, fuses, wiring, bulbs (or LEDs), and other parts that help signal to other drivers when you’re braking. Understanding these electronics is important to ensure your brake lights always function correctly.

    What Are the Key Electronic Components in the 2011 Toyota 4Runner Brake Lights?

    • Brake Light Switch: Located near the brake pedal, this switch sends a signal to the brake lights when you press the pedal.
    • Fuse and Relay: The fuse protects the brake light circuit from too much electrical 

    current, and a relay may help manage the power.

    • Wiring and Connectors: These carry the electrical signal to the brake lights. Any damage to them can cause the lights to malfunction.
    • Bulbs or LED Modules: Depending on whether your 4Runner uses traditional bulbs or LEDs, they need electricity to light up.
    • Body Control Module (BCM): This manages many electrical systems in your vehicle and can affect your brake lights if it malfunctions.

    What Is the Electrical Problem with the Brake Lights? – Issues That Can Affect!

    If your 2011 Toyota 4Runner’s brake lights aren’t working, it could be due to an electrical problem. Common issues include:

    Blown Fuse: 

    A blown fuse is one of the most frequent problems. If the fuse responsible for the brake light circuit burns out, it cuts off the power to the brake lights, preventing them from turning on.

    Faulty Brake Light Switch: 

    If the brake light switch, located near the brake pedal, malfunctions, it won’t send the necessary signal to the lights when you press the brake pedal.

    Wiring Issues: 

    Damaged or corroded wires can disrupt the electrical flow from the switch to the brake lights, causing them to stop working or flicker.

    Poor Ground Connection: 

    The brake light circuit requires a solid ground connection to complete the electrical loop. If this connection is loose or faulty, the lights may dim or not work at all.

    Burnt-out Bulbs or LED Failure: 

    If the traditional bulbs burn out or the LED modules fail, the lights won’t illuminate even if the rest of the system is working properly.

    How Does the Brake Light System Work in the 2011 Toyota 4Runner?

    When you press the brake pedal in your 4Runner, the brake light switch gets triggered. This switch sends an electrical signal through the wiring, telling the brake lights to turn on. If your 4Runner uses LED brake lights, they may need special voltage management from the Body Control Module (BCM) to work correctly. If all the electronics are in good shape, the brake lights illuminate, warning other drivers that you’re slowing down or stopping.

    Why Are Electronics Important for the 2011 Toyota 4Runner Brake Lights?

    Electronics are essential for the brake lights to work because they control everything from the signal transmission when you press the brake pedal to the actual lighting up of the bulbs or LEDs. Without the right electronic systems in place, your brake lights wouldn’t activate, which could be dangerous for you and other drivers on the road.

    How Can You Troubleshoot Brake Light Electronics in the 2011 Toyota 4Runner?

    If your brake lights aren’t working, here are some troubleshooting steps you can take:

    • Check the Fuse: Open the fuse box and see if the brake light fuse is blown. Replace it if necessary.
    • Test the Brake Light Switch: Ensure the switch near the brake pedal is functioning properly.
    • Inspect the Wiring: Look for any loose or damaged wires that might be disrupting the circuit.
    • Check the Bulbs or LEDs: Make sure the bulbs aren’t burnt out or, if you have LEDs, that the modules aren’t faulty.

    Which Maintenance Steps Help Keep the Brake Light Electronics Functioning?

    Regularly Check the Bulbs or LEDs:

    Periodically check that your brake lights are working. Turn on the ignition, press the brake pedal, and see if the lights come on. If one or both lights are out, replace the bulbs or LEDs.

    Inspect the Fuse and Wiring:

    Check the Fuse: 

    Find the fuse box (usually under the dashboard or in the engine bay) and look for the fuse related to the brake lights. If the fuse is blown, replace it with a new one of the same rating.

    Examine the Wiring: 

    Look at the wires connected to the brake lights and brake light switch. Check for any fraying, cuts, or loose connections. Repair or replace damaged wiring as needed.

    Service the Brake Light Switch:

    Test the Switch: 

    Ensure the brake light switch (near the brake pedal) is working properly. If you notice the brake lights not turning on or staying on, the switch might need adjusting or replacing.

    Keep Electrical Components Clean:

    Dirt and moisture can affect electrical connections. Regularly clean the area around the brake lights and switch to prevent corrosion or buildup. Make sure the brake light assemblies are sealed properly to keep out water. If you find moisture inside, address the issue to avoid electrical problems.

    Verify Connections:

    Ensure all electrical connections are tight and free of corrosion. Loose or corroded connections can cause intermittent brake light issues.

    What Sends the Signal That Turns on the Brake Lights?

    The brake light switch is the component that sends the signal to turn on the brake lights. It’s located near the brake pedal. When you press the pedal, the switch closes the circuit, allowing electricity to flow to the brake lights, causing them to illuminate. Without the brake light switch working properly, the lights won’t receive the signal to turn on.

    What Controls the Brake Lights?

    The brake lights are controlled by a combination of the brake light switch and the vehicle’s electrical system. When the switch is activated by pressing the brake pedal, it sends an electrical signal to the brake lights. The Body Control Module (BCM) or a similar control unit may also help regulate the electrical flow, especially in vehicles with more advanced lighting systems, like LED brake lights.

    How Do I Know If My Brake Light Wiring Switch Is Broken?

    You might have a broken brake light switch if:

    • Your brake lights don’t turn on when you press the brake pedal.
    • The brake lights stay on even when you’re not braking.
    • The cruise control stops working (since it’s often connected to the brake light switch).
    • You get a warning light on your dashboard.

    Testing the switch with a multimeter or having a mechanic check it can confirm if it’s broken.

    What Will a Bad Brake Light Switch Cause?

    A bad brake light switch can cause several issues:

    Brake Lights Won’t Turn On: 

    If the switch fails, the lights won’t illuminate when you press the brake pedal.

    Brake Lights Stay On: 

    A malfunctioning switch may keep the lights on even when you release the pedal, draining your battery.

    Cruise Control Issues: 

    Some vehicles connect the brake light switch to the cruise control system, so a faulty switch could cause the cruise control to disengage or not work.

    Transmission Shift Problems: 

    In some cars, a bad brake light switch may prevent the vehicle from shifting out of “Park.”

    Can I Fix My Own Brake Light Switch?

    Yes, you can usually fix or replace the brake light switch yourself. Here’s a simple guide:

    Find the Switch:

    Look under the dashboard near the brake pedal. The switch is a small part connected to the pedal.

    Unplug the Wires:

    You’ll see a plug with wires attached to the switch. Gently press the clip or tab to unplug it.

    Remove the Old Switch:

    The switch might be held in place by screws or clips. If it’s screws, use a screwdriver to remove them. If it’s clips, carefully unclip it.

    Install the New Switch:

    Put the new switch in the same spot. If it was screwed in, screw it back in. If it was clipped, snap it back into place.

    Reconnect the Wires:

    Plug the wires back into the new switch. Make sure it’s snug and secure.

    Test the Brake Lights:

    Press the brake pedal to see if the lights work. If they do, you’ve successfully fixed or replaced the switch.

    Frequently Asked Questions:

    What is the role of the Body Control Module (BCM) in the brake light system?

    The Body Control Module (BCM) helps manage various electrical functions in your vehicle, including the brake lights. It can control the timing and operation of the lights based on signals from the brake light switch.

    How does the brake light switch work with the cruise control system?

    In some vehicles, including the 4Runner, the brake light switch is connected to the cruise control system. When you press the brake pedal, the switch signals the cruise control to turn off, ensuring your vehicle slows down safely.

    What should I do if only one brake light is working?

    If only one brake light is working, check the bulb in the non-working light and replace it if necessary. Also, inspect the wiring and connections for any damage. If both bulbs are fine, the issue might be with the brake light switch or fuse.

    Can a faulty brake light switch affect other vehicle functions?

    Yes, a faulty brake light switch can affect other functions like cruise control and transmission shifting. It may also cause issues with the brake lights staying on or not turning on.

    How can I prevent moisture from affecting my brake light electronics?

    To prevent moisture issues, ensure that the brake light assemblies are properly sealed. If you notice condensation inside the lights, check for any leaks or damaged seals and fix them to keep moisture out.

    Why might my brake lights flicker?

    Flickering brake lights can be caused by loose connections, a failing brake light switch, or a faulty bulb. Check the connections and switch, and replace any damaged components to fix the flickering.

    Is it necessary to use OEM parts for brake light repairs?

    While OEM (Original Equipment Manufacturer) parts are recommended for the best fit and performance, high-quality aftermarket parts can also work well. Ensure that any replacement parts meet the specifications of your 2011 Toyota 4Runner.

    How often should I check the brake light system?

    It’s a good idea to check the brake light system every few months or during regular vehicle maintenance. Regular checks help catch any issues early and ensure the brake lights are always functioning properly.

    Conclusion:

    What Electronics Are Involved 2011 Toyota 4runner Brake Lights? The brake lights on your 2011 Toyota 4Runner rely on several key electronics to work properly, including the brake light switch, fuses, wiring, and bulbs or LEDs. By understanding these components and regularly checking and maintaining them, you can ensure your brake lights function correctly and keep you safe on the road. Regular inspections and timely repairs will help keep your brake light system in top shape.

    Also Read:

    Will A Queen Bed Fit Inside Toyota Tundra?

    How Many Pounds Is Safe to Tow with the 2021 Toyota Tundra?

  • Gen 3 4Runner IAC Valve – An Essential Component of Engine!

    Gen 3 4Runner IAC Valve – An Essential Component of Engine!

    When my Gen 3 4Runner started having idle issues, I learned how important the Idle Air Control (IAC) valve is. I replaced the IAC valve, but the check engine light stayed on. I found that cleaning the throttle body and checking for vacuum leaks helped fix the problem. After making sure everything was installed correctly and clearing the error codes, the issue was resolved. If you’re having similar problems, make sure to clean and check everything it really helps.

    The Gen 3 4Runner IAC valve (Idle Air Control valve) is a key component that helps regulate your engine’s idle speed. Located on the throttle body, it controls the amount of air bypassing the throttle plate to maintain a smooth idle. If you’re experiencing issues like rough idling or engine stalling, the IAC valve might be the problem. Regular maintenance and timely replacement can keep your engine running smoothly.

    What is the Gen 3 4Runner IAC Valve?

    The Gen 3 4Runner IAC valve, or Idle Air Control valve, is an essential part of the engine management system in the third-generation Toyota 4Runner, which was made between 1996 and 2002. This valve helps control the engine’s idle speed by regulating the amount of air that bypasses the throttle plate.

    Key Features of the Gen 3 4Runner IAC Valve:

    • Function: When you start your engine, the IAC valve adjusts how much air enters the engine to keep it running smoothly at idle. It does this by opening and closing based on the engine’s needs.
    • Location: The IAC valve is typically mounted on the throttle body, which is part of the air intake system. The throttle body controls how much air flows into the engine when you press the gas pedal.
    • Importance: A properly functioning IAC valve is crucial for maintaining a stable idle speed, especially when the engine is cold or when additional electrical loads (like the air conditioner) are applied.
    • Adjustment: The valve works automatically, responding to signals from the engine control unit (ECU) to adjust the air intake. This helps ensure that the engine remains stable and doesn’t stall when idling.
    • Signs of Failure: If the IAC valve fails, you might notice problems like a rough idle, fluctuating idle speed, or stalling. This is because the valve is not regulating the airflow properly.

    How Does the Gen 3 4Runner IAC Valve Work?

    The Gen 3 4Runner IAC valve helps keep the engine idling smoothly. When the engine is at idle, the valve controls how much air gets around the closed throttle. It has a small motor that opens or closes the valve to let the right amount of air into the engine. This helps keep the engine running steadily, even when things like the air conditioner are turned on or when the engine is cold. By managing the airflow, the IAC valve helps prevent stalling and keeps the engine running well.

    When to Check or Replace the Gen 3 4Runner IAC Valve?

    Erratic Idle Speed:

    If your engine’s idle speed keeps changing on its own, going up and down, it might be time to check the IAC valve. This valve controls how much air gets into the engine when it’s not accelerating, so if it’s not working right, your engine may not idle smoothly.

    Engine Stalling:

    If your engine stalls or turns off while you’re idling or stopping, the IAC valve might be at fault. A faulty IAC valve can prevent the engine from getting the right amount of air, causing it to shut off unexpectedly.

    Check Engine Light:

    If your check engine light comes on and a code points to the IAC valve, it’s a sign that something might be wrong. This code means the vehicle’s computer has detected an issue with the IAC valve or its wiring.

    Poor Acceleration or Rough Running:

    If your 4Runner has trouble speeding up or runs roughly when you start driving, the IAC valve could be to blame. It helps manage the engine’s air intake, so problems with the valve can affect how the engine performs.

    Increased Fuel Consumption:

    If you’re noticing that you’re using more fuel than usual, and your engine idles poorly, the IAC valve might not be working properly. This can lead to higher fuel consumption.

    Unusual Engine Sounds:

    If you hear strange noises from the engine, like whining or hissing while it’s idling, it could be due to a problem with the IAC valve. These sounds might indicate issues with air flow or vacuum leaks.

    How to Maintain or Replace the Gen 3 4Runner IAC Valve?

    Regular Cleaning:

    The IAC valve can get dirty and covered in carbon, which can affect how it works. Clean it regularly with a throttle body or IAC valve cleaner. Just spray the cleaner on a rag and wipe the valve. Be careful not to use anything rough that could damage it.

    Inspect Connections:

    Check the electrical connections to the IAC valve to make sure they are clean and securely connected. Also, look at the vacuum hoses attached to the valve for any cracks or loose fittings. Damaged hoses can cause air leaks, which can affect the engine’s idle speed.

    Check for Leaks:

    Look for any air leaks around the intake manifold and vacuum hoses. Use a smoke machine or spray soapy water around these areas while the engine is running. If you see bubbles or smoke, there’s a leak that needs fixing.

    Ensure Proper Installation:

    When replacing the IAC valve, make sure it’s properly installed. It should fit well with the throttle body and be secured with the right screws or bolts. Also, check that any gaskets or seals are in good shape and correctly placed to avoid air leaks.

    Reset the ECU:

    After cleaning or replacing the IAC valve, you might need to reset the engine control unit (ECU) to clear old error codes and update the system. Disconnect the negative battery terminal for a few minutes, then reconnect it. This can help the ECU recognize the new or cleaned valve and fix any related issues.

    How to Replace the Gen 3 4Runner IAC Valve?

    • Locate the IAC Valve: The IAC valve is typically mounted on the throttle body. Refer to your vehicle’s manual for its exact location.
    • Disconnect the Battery: For safety, disconnect the negative battery terminal to prevent electrical shorts.
    • Remove the Old Valve: Unplug the electrical connector and remove the mounting screws or bolts that hold the IAC valve in place.
    • Install the New Valve: Position the new IAC valve, secure it with screws or bolts, and reconnect the electrical connector.
    • Reconnect the Battery: Reattach the negative battery terminal and ensure everything is properly connected.

    What Are the Common Issues in Changing the Gen 3 4Runner IAC Valve?

    • Improper Installation: Ensure that the new IAC valve is installed correctly, with all connections properly secured.
    • Vacuum Leaks: Check for any vacuum leaks that could affect the new valve’s performance. Even a small leak can cause idle issues.
    • Electrical Issues: Verify that all electrical connections are properly made and that there are no issues with the wiring.
    • Calibration: Sometimes, the new IAC valve may require calibration or adjustment to work correctly with the vehicle’s ECU.
    • Residual Codes: After installation, clear any residual trouble codes from the vehicle’s ECU to avoid false readings.

    What to Do If Replacing the IACV Doesn’t Fix the Code

    Double-Check the Error Code:

    Ensure the error code is indeed related to the IACV. Sometimes, codes can be misleading or point to different issues.

    Inspect the Installation:

    Verify that the IACV is properly installed. Check that all electrical connections and vacuum hoses are securely attached, and confirm that gaskets and seals are correctly placed and not damaged.

    Look for Vacuum Leaks:

    Examine all vacuum hoses and connections for cracks or leaks. Use a smoke machine or spray soapy water around the intake area to detect any leaks.

    Examine Related Components:

    Clean the throttle body if it’s dirty, as carbon build-up can affect both the throttle and IACV. Also, check the throttle position sensor (TPS) for proper functioning.

    Reset the ECU:

    Disconnect the negative battery terminal for a few minutes to reset the ECU. Reconnect it and check if the code reappears. This can help clear old codes and update the system.

    Check Electrical Wiring:

    Inspect the wiring connected to the IACV for any damage or wear. Use a multimeter to ensure the IACV is receiving the correct voltage.

    Consult a Professional:

    If the issue persists after trying all these steps, seek help from a mechanic. They can perform a thorough diagnostic to find and fix the problem.

    Frequently Asked Questions:

    How can I tell if my IACV is failing?

    Common signs of a failing IACV include a rough or fluctuating idle, stalling when the engine is at a stop, or a check engine light related to idle control. You might also notice poor acceleration or an erratic idle speed.

    Can a dirty air filter affect the IACV?

    Yes, a dirty or clogged air filter can impact the IACV’s performance. It can cause poor airflow, which can affect idle speed and lead to issues with the IACV.

    How often should I replace the IACV?

    There is no set schedule for replacing the IACV. It typically depends on symptoms and the vehicle’s overall condition. If you experience idle issues or receive related error codes, it may be time to check or replace the IACV.

    Can I drive with a malfunctioning IACV?

    While you can drive with a malfunctioning IACV, it may cause rough idling, stalling, or poor acceleration. It’s best to address the issue as soon as possible to avoid further engine problems.

    What other parts should I check if the IACV is not the problem?

    If the IACV isn’t the issue, check related parts such as the throttle body, throttle position sensor (TPS), and vacuum hoses. Also, ensure there are no air leaks in the intake system and that the ECU is functioning correctly.

    Conclusion:

    The Gen 3 4Runner IAC valve plays a crucial role in maintaining smooth idle and engine performance. Regular maintenance, such as cleaning and inspecting connections, helps ensure its proper function. If replacing the IAC valve doesn’t resolve issues, check for vacuum leaks, related components, and ensure proper installation. By addressing these factors, you can keep your 4Runner running smoothly and efficiently. For persistent problems, consulting a professional mechanic can provide further assistance.

  • 2024 Toyota Tundra TRD Pro with Custom Overland Build

    2024 Toyota Tundra TRD Pro with Custom Overland Build

    The 2024 Toyota Tundra TRD Pro with Custom Overland Build is a strong and flexible pickup truck perfect for off-road adventures. It has a powerful twin-turbo V6 engine and a special suspension for smooth rides on rough roads. With extra features like roof racks and bigger tires, it provides more space for your gear and makes it easier to explore the outdoors. Whether you’re towing something or going off the beaten path, the Tundra TRD Pro is reliable and stylish for anyone who loves adventure.

    What is the 2024 Toyota Tundra TRD Pro?

    The 2024 Toyota Tundra TRD Pro is a powerful and rugged pickup truck built for serious off-road adventures. It features a 3.4-liter twin-turbocharged V6 engine that produces around 389 horsepower and 479 lb-ft of torque, providing excellent power for towing and traversing difficult terrains. The Tundra TRD Pro is equipped with a 10-speed automatic transmission for smooth gear transitions and improved fuel efficiency. With a maximum towing capacity of approximately 12,000 pounds, it’s suitable for hauling trailers and outdoor gear.

    When was the TRD Pro Series Introduced?

    The TRD Pro series was first introduced in 2014 as Toyota’s premium line of off-road vehicles. The 2024 model continues the tradition of enhancing performance and capability with each iteration. The series has gained a loyal following among off-road enthusiasts for its blend of ruggedness, reliability, and advanced technology.

    Why Choose the Custom Overland Build?

    Choosing a custom Overland build for the Tundra TRD Pro enhances its suitability for long-distance travel and remote camping. Key advantages include:

    • Increased Storage: Features like roof racks, bed extenders, and storage drawers allow you to carry more gear.
    • Enhanced Protection: Upgraded bumpers and skid plates provide additional protection against rough terrains and obstacles.
    • Comfort Upgrades: Custom interior modifications, such as improved seating and additional tech features, enhance the overall travel experience.

    How Does the Custom Overland Build Improve Performance?

    A custom Overland build significantly enhances performance through:

    Suspension Upgrades: 

    Enhanced shock absorbers and springs increase ground clearance, improving the vehicle’s ability to navigate over obstacles. This results in a smoother ride on bumpy roads.

    Larger All-Terrain Tires: 

    These tires provide better traction and stability on loose surfaces like gravel, mud, and sand, making it easier to tackle challenging off-road conditions.

    Skid Plates: 

    These protective plates shield critical components like the oil pan and transmission from rocks and debris, ensuring durability during off-road adventures.

    Which Features Make the 2024 Tundra TRD Pro Stand Out?

    Several features make the 2024 Tundra TRD Pro a standout vehicle:

    • Powerful Engine: The twin-turbocharged V6 delivers exceptional performance and efficiency, with an EPA rating of up to 18 mpg in the city and 24 mpg on the highway.
    • TRD Pro Suspension: This advanced system includes Fox internal bypass shocks, providing superior handling and comfort on rough terrain.
    • Technology Integration: The Tundra comes equipped with a 14-inch touchscreen with Toyota’s latest infotainment system, featuring Apple CarPlay, Android Auto, and navigation.

    What Are the Interior Comforts?

    The Tundra TRD Pro features a well-appointed interior that prioritizes comfort and convenience, comfortably seating up to five passengers with ample headroom and legroom. The cabin is adorned with high-quality materials, including luxurious leather upholstery and elegant wood trim, enhancing its upscale feel. Additionally, the advanced infotainment system boasts a 14-inch touchscreen, providing easy access to navigation, music, and various vehicle settings, while the premium audio system ensures an enjoyable listening experience for all occupants.

    2024 Toyota Tundra TRD Pro with Custom Overland Build
    Source: YouTube

    When to Consider a Custom Build?

    Regularly Go Camping: 

    The added storage and capabilities allow you to carry tents, coolers, and other camping gear with ease.

    Enjoy Off-Roading: 

    If you frequently drive in rugged terrains, modifications enhance performance and safety.

    Plan Long-Distance Travels: 

    The custom build prepares your vehicle for extended trips into remote areas where access to resources may be limited.

    How to Maintain Your Tundra TRD Pro?

    Regular Inspections: 

    Check oil levels, brake fluid, and tire pressure monthly. Look for wear on tires and brakes, especially after off-road use.

    Follow the Maintenance Schedule: 

    Adhere to Toyota’s recommended maintenance intervals for oil changes, filter replacements, and other services to keep the vehicle running smoothly.

    Post-Adventure Cleaning: 

    After off-roading, wash the undercarriage to remove mud and debris that can cause corrosion. This is especially important in winter months when salt is used on roads.

    Is the Toyota Tundra Good for Overlanding?

    Yes, the Toyota Tundra is an excellent choice for overlanding because of its robust build quality, which ensures durability and reliability on long journeys. Its off-road capabilities, including features like four-wheel drive and locking differentials, enhance performance on rugged trails. Additionally, the Tundra offers ample cargo space, allowing you to transport all the gear and supplies needed for extended trips into remote areas.

    How Much Will the 2024 Toyota Tundra TRD Pro with Custom Overland Build Cost?

    The starting price for the 2024 Tundra TRD Pro is around $53,000. However, when you add custom Overland modifications, costs can rise significantly. Depending on the extent of the upgrades, the total price may range from $70,000 to $90,000, factoring in parts, labor, and additional accessories.

    What Would Be Your First Three Upgrades in an Overland Build?

    For a custom Overland build, consider these essential upgrades:

    • Roof Rack System: Provides additional storage for gear and accessories, such as tents and kayaks.
    • All-Terrain Tires: Upgrading to larger, rugged tires will enhance traction and stability across various terrains.
    • Suspension Lift Kit: Increasing ground clearance helps navigate obstacles more effectively, improving overall off-road performance.

    Should I Overland in a 2024 Toyota Tundra Platinum Edition?

    While the Platinum edition offers a lot in terms of luxury and technology, it is primarily designed for on-road comfort. If your focus is primarily on overlanding, the TRD Pro is the better choice due to its dedicated off-road features and enhanced capabilities.

    Why Are Toyotas So Popular for Overlanding?

    Proven Reliability: 

    Toyota vehicles are known for their longevity and dependability, even in harsh conditions.

    Off-Road Features: 

    Many Toyota models, including the Tundra and Tacoma, come equipped with features specifically designed for off-roading.

    Extensive Aftermarket Support: 

    A wide variety of accessories and modifications are available, allowing owners to customize their vehicles to meet specific overlanding needs. This includes everything from roof racks to specialized lighting.

    Frequently Asked Questions:

    1. What colors are available for the 2024 Tundra TRD Pro?

    The 2024 Tundra TRD Pro offers a variety of colors, including classic shades like black and white, as well as more vibrant options like Lunar Rock and Supersonic Red.

    2. Can I tow with the Tundra TRD Pro?

    Yes, the Tundra TRD Pro has a maximum towing capacity of around 12,000 pounds, making it suitable for trailers, boats, or campers.

    3. What safety features come with the Tundra TRD Pro?

    It includes advanced safety features like adaptive cruise control, lane departure alert, blind-spot monitoring, and automatic emergency braking.

    4. Is the Tundra TRD Pro fuel-efficient?

    While the Tundra TRD Pro is not the most fuel-efficient truck, it offers decent mileage for its class, with an EPA rating of up to 18 mpg in the city and 24 mpg on the highway.

    5. Can I customize the Tundra TRD Pro after purchase?

    Absolutely! There are many aftermarket options available for customizing your Tundra, including suspension upgrades, different tires, and storage solutions.

    6. What is the warranty coverage for the Tundra TRD Pro?

    The Tundra typically comes with a 3-year/36,000-mile basic warranty and a 5-year/60,000-mile powertrain warranty, providing peace of mind for buyers.

    7. How does the Tundra TRD Pro compare to other trucks in its class?

    The Tundra TRD Pro is known for its ruggedness, reliability, and off-road capabilities, making it a strong competitor against other trucks like the Ford F-150 Raptor and the Ram 1500 Rebel.

    Conclusion:

    The 2024 Toyota Tundra TRD Pro with Custom Overland Build is an ideal choice for adventure enthusiasts. With its powerful engine, advanced off-road features, and spacious interior, it offers both performance and comfort for long journeys. Whether you’re tackling rugged trails or embarking on extended camping trips, this truck provides the reliability and versatility you need. Customize it to fit your needs and enjoy the great outdoors with confidence.

  • How to Paint Digia Tundra? – A Helpful Guide!

    How to Paint Digia Tundra? – A Helpful Guide!

    How To paint Digia Tundra?, start by gathering your digital tools like a graphics tablet and painting software. Begin with a light sketch of your landscape, then block in large areas of color for the sky and land using broad strokes. Focus on the overall shapes rather than details at first. Next, add textures and fine details, paying attention to lighting and shadows for depth. Finally, review your painting and make any necessary adjustments. Enjoy the process and let your creativity shine. 

    Last summer, I decided to paint a Digia Tundra scene in my garage. I wanted to capture the calm beauty of tundra landscapes, and working in my own space made it easy to focus. I started by getting all my tools ready and opened my digital painting software. I began blocking in the big colors for the sky and land, which felt freeing because I didn’t worry about making it perfect.

    One helpful thing I learned was to take breaks. Stepping away for a bit helped me see my painting with fresh eyes, making it easier to notice what needed fixing. I also found that blending colors together made my painting look more realistic. Overall, painting Digia Tundra was a fun and rewarding experience. It taught me to be patient and enjoy the process of creating art. I encourage everyone to give it a try, set up your space, start painting, and let your creativity shine.

    What is Digia Tundra?

    Digia Tundra refers to a digital painting style that captures the beauty and unique features of tundra landscapes. These environments are characterized by cold temperatures, low vegetation, and distinctive colors that change with the seasons. Artists use this style to express the serene yet rugged nature of these regions.

    Why Paint Digia Tundra?

    Painting Digia Tundra allows artists to explore themes of nature, isolation, and the stark beauty of cold landscapes. It’s a chance to connect with the environment and convey emotions through color and texture. This style can also enhance your skills in digital painting and broaden your artistic range.

    When to Start Painting Digia Tundra?

    The best time to start painting Digia Tundra is whenever you feel inspired! Many artists prefer to paint during winter months or when they can observe tundra-like environments. If you have access to reference photos or can visit tundra areas, that’s even better. Allow yourself to experiment and learn at your own pace.

    How to Prepare Your Workspace for Painting Digia Tundra?

    Organize Your Digital Tools:

    A well-organized workspace is crucial for creativity. Ensure you have your digital painting software open and your graphics tablet ready.

    Arrange Your Supplies:

    Arrange your tools, such as brushes and color palettes, within easy reach to streamline your painting process.

    Ensure Good Lighting:

    Good lighting can also help, so try to paint in a well-lit area. This will improve your visibility and make it easier to see colors accurately.

    How to Choose Your Color Palette for Painting Digia Tundra?

    Understand Color Basics:

    Selecting the right colors is essential for depicting tundra landscapes. Consider using cool blues and whites for ice and snow, earthy browns and greens for vegetation, and soft grays for rocks.

    Create a Custom Palette:

    You can create a custom palette in your painting software, making it easier to access your chosen colors as you work.

    How to Sketch Your Composition?

    Begin with a light sketch to outline your composition. Use simple shapes to represent key elements like mountains, lakes, and trees. Focus on the overall layout rather than details at this stage. You can adjust proportions and positions until you’re satisfied with the balance of your scene.

    How to Block in Basic Colors?

    Once your sketch is complete, start blocking in colors. Use large, broad strokes to fill in the sky, land, and major features. Don’t worry about perfection; this stage is about establishing the foundation. You can refine these colors later.

    Start with the Sky:

    Begin by applying the base color for the sky. Use broad strokes to cover this large area.

    Fill in the Land:

    Next, move to the land. Choose colors that represent the ground, hills, or any other major features.

    Use Large Brushes:

    Utilize large brushes to make the application of colors easier and quicker, allowing you to cover more space efficiently.

    Don’t Worry About Details:

    At this stage, focus on the overall shapes and colors rather than fine details. This is just about laying down the foundation.

    Blend Where Needed:

    If colors overlap, blend them gently at the edges to create smooth transitions.

    Review and Adjust:

    After blocking in the colors, step back and assess your work. You can always adjust and refine these colors later in the process.

    How to Add Details?

    With the base colors in place, it’s time to add details. Use smaller brushes to paint textures like grass, rocks, and clouds. Layer different colors to create depth and interest. Pay attention to how light interacts with each element, adding highlights and shadows for realism.

    How to Work on Lighting?

    Lighting is crucial in creating mood and depth. Observe how light affects the tundra in real life, noting where shadows fall and how colors change. Use lighter shades to highlight areas where light hits directly and darker shades for shadowed regions. This contrast will enhance the overall impact of your painting.

    Which Tools and Brushes to Use?

    For digital painting, a variety of brushes can help achieve different textures. Use soft brushes for blending and hard brushes for sharp edges. Texture brushes can mimic natural elements like grass and rocks. Experiment with different brush settings to find what works best for your style.

    How to Finalize Your Painting?

    To finish your painting, take a step back and assess your work. Make any final adjustments, such as enhancing colors or adding details. Consider applying a final layer of adjustment to unify the painting’s elements. Save your work in multiple formats to ensure you have backups.

    How To Tint Your Headlights

    Tinting headlights can enhance the look of your vehicle while providing a stylish touch. Make sure to choose a legal tint that complies with local regulations. Clean the headlights thoroughly and use a tinting film or spray. Apply it evenly and allow it to cure properly for a lasting effect.

    How to Paint a Car in 2K?

    Painting a car in 2K involves using two-component paint that offers durability and a high gloss finish. Start by sanding the surface to prepare it. Mix the paint according to the manufacturer’s instructions, and apply it in thin, even coats. Allow each coat to dry before applying the next.

    Is 2K Paint Easy to Spray?

    Yes, 2K paint can be easy to spray if you follow the right techniques. Ensure you have the proper spray equipment and practice on scrap material first. The key is to maintain a consistent distance from the surface and apply even pressure on the spray gun.

    Do I Need a Clear Coat Over 2K Paint?

    Yes, applying a clear coat over 2K paint is recommended. The clear coat adds an extra layer of protection against UV rays and environmental damage, ensuring a longer-lasting finish. It also enhances the gloss and depth of the color.

    Can You Paint an Engine with 2K?

    Yes, you can paint an engine with 2K paint. However, ensure the paint is heat-resistant and suitable for automotive use. Prepare the engine surface by cleaning and degreasing it before applying the paint in thin coats.

    Is It Better to Paint a Car 1K or 2K?

    2K paint is generally better for automotive applications due to its durability and resistance to scratches and chemicals. 1K paint can be easier to use but may not provide the same level of protection or finish quality as 2K.

    How Many Coats of 2K Paint on a Car?

    Typically, you should apply at least 2-3 coats of 2K paint for optimal coverage and durability. Allow each coat to dry before applying the next. This ensures a smooth and even finish that will last.

    Frequently Asked Questions:

    1. What is the best software for painting Digia Tundra?

    Popular software options include Adobe Photoshop, Procreate, and Corel Painter. Each offers different tools that can help you create beautiful digital landscapes.

    2. How do I find inspiration for my painting?

    Look for inspiration in nature, photography, or even other artists’ work. You can also explore documentaries or books about tundra environments.

    3. Can I use a mouse instead of a graphics tablet?

    While it’s possible to use a mouse, a graphics tablet provides better control and precision, making it easier to create detailed artwork.

    4. How long does it take to complete a Digia Tundra painting?

    The time it takes varies greatly depending on your skill level and the complexity of the piece. It could range from a few hours to several days.

    5. Should I use reference images?

    Yes! Reference images can help you understand the colors, textures, and lighting of tundra landscapes, making your painting more realistic.

    6. How do I fix mistakes in my painting?

    Most digital painting software has undo options. You can also use layers to make changes without affecting the entire piece.

    7. Is it necessary to have drawing skills to paint Digia Tundra?

    While having drawing skills can help, it’s not mandatory. Practice and using guidelines can improve your ability over time.

    Conclusion:

    Painting Digia Tundra and exploring related topics like automotive painting techniques can be fulfilling. With the right approach and tools, you can create stunning artwork or enhance the look of your vehicle. Dive into your projects with creativity and confidence!

  • 022 Tundra Stage 2 Turbo Kit – Great Upgrade For Toyota Tundra Owners!

    022 Tundra Stage 2 Turbo Kit – Great Upgrade For Toyota Tundra Owners!

    The 022 Tundra Stage 2 Turbo Kit is a specialized performance upgrade designed for Toyota Tundra trucks, particularly those equipped with the 5.7L V8 engine. This turbo kit enhances the truck’s power by significantly increasing its horsepower and torque. The kit provides the necessary components and tuning options to transform your truck’s performance capabilities, making it suitable for both everyday driving and demanding situations like towing or off-roading.

    When Should You Consider Upgrading to the Turbo Kit?

    You should consider upgrading to the Stage 2 Turbo Kit if you want to enhance your truck’s performance significantly. This upgrade is especially beneficial if:

    • You frequently tow heavy loads or haul equipment.
    • You enjoy off-roading and need more power for challenging terrains.
    • You want a more exciting driving experience with improved acceleration.
    • You are looking to compete in motorsport events or car shows.

    Why Choose the Stage 2 Turbo Kit?

    The Stage 2 Turbo Kit is a compelling upgrade for several reasons: it can significantly boost your truck’s power by adding around 100 to 200 horsepower, enhancing both speed and acceleration. Additionally, it improves torque, allowing your truck to handle heavier loads and navigate inclines more effectively. The kit offers tuning flexibility, enabling you to customize performance based on your specific needs, whether that’s for speed or towing. Furthermore, by increasing airflow to the engine, the turbo can enhance engine efficiency, which may lead to improved fuel economy in certain driving conditions.

    How Does the Turbo Kit Work?

    The 022 Tundra Stage 2 Turbo Kit enhances your truck’s performance by forcing more air into the engine. Here’s how it works:

    Turbochargers: 

    The kit includes two turbochargers that compress the air before it enters the engine, allowing more air (and fuel) to be burned, which creates more power.

    Intercooler: 

    This is a crucial part of the system that cools the compressed air coming from the turbos. Cooler air is denser, which means more oxygen is available for combustion, improving performance.

    Fuel Injectors: 

    These are upgraded to supply more fuel to match the increased air intake. This helps maintain the right air-fuel mixture for optimal performance.

    Tuning Module: 

    After installing the kit, a tuning module adjusts the engine’s settings to optimize performance, manage the boost pressure, and ensure the engine runs smoothly without any damage.

    Which Components Are Included in the Kit?

    The 022 Tundra Stage 2 Turbo Kit generally includes several important parts:

    • Turbochargers: Two powerful turbochargers that enhance airflow and increase power.
    • Intercooler: Helps cool the air from the turbo before it enters the engine, improving efficiency.
    • Piping: High-quality piping connects all the components of the turbo system to ensure efficient airflow.
    • Fuel Injectors: Upgraded injectors that provide the additional fuel needed for the increased air intake.
    • Tuning Module: This helps adjust the engine settings for better performance and prevents any issues that might arise from the turbo system.

    What Are the Installation Considerations?

    Installing the Stage 2 Turbo Kit requires careful consideration, as it is a complex process best handled by a professional who is experienced in turbo installations. This ensures that all parts are fitted correctly and safely, minimizing the risk of engine damage. The installation can take several hours and may require specialized tools, so it’s crucial to be prepared for the time and equipment needed for the job. Additionally, following the manufacturer’s installation guidelines is essential to avoid mistakes that could compromise engine performance or reliability. Proper installation not only ensures functionality but also enhances the longevity of your vehicle’s performance.

    What Are the Performance and Reliability Factors?

    While the Stage 2 Turbo Kit can greatly enhance performance, it also has some implications for the engine:

    Increased Stress on Components: 

    Adding extra horsepower puts more strain on engine parts, which can lead to faster wear. Some users recommend upgrading engine internals (like pistons and rods) to handle this extra power.

    Cooling Requirements: 

    Because the turbo generates more heat, you may need a better cooling system to keep the engine temperature in check, ensuring long-lasting performance.

    Importance of Tuning: 

    After installing the kit, proper tuning is crucial. This process optimizes performance and protects the engine from damage due to improper fuel-air mixtures.

    How Much Does the Turbo Kit Cost?

    The cost of the 022 Tundra Stage 2 Turbo Kit typically falls within the range of $1,500 to $5,000. This price can vary based on several factors:

    • Component Quality: Different manufacturers may charge different prices based on the quality of the parts included.
    • Installation Costs: If you opt for professional installation, this can add several hundred dollars to the total cost, depending on the shop’s labor rates and the complexity of the installation.

    Where Can You Find More Information?

    To learn more about the 022 Tundra Stage 2 Turbo Kit, you can explore:

    • Automotive Forums: Websites like TundraTalk and ExtremeTerrain are excellent places to read user reviews and experiences regarding the turbo kit.
    • Performance Parts Retailers: Many online and local retailers provide detailed product descriptions, specifications, and customer feedback.
    • YouTube Videos: There are many videos available that showcase installation processes, reviews, and real-world performance results from actual users.

    How Much HP Does a Stage 2 Turbo Add?

    The Stage 2 turbo kit can add about 100 to 200 extra horsepower to your Toyota Tundra. How much power you get depends on several things, like how well the truck is tuned and if you have other upgrades. Tuning is important because it adjusts how the engine mixes air and fuel to work better with the new turbo. If you also improve other parts, like the exhaust or fuel injectors, you could see even more horsepower. It’s a good idea to work with a professional tuner to get the best performance from your truck.

    What Size Turbo is the 022 Tundra?

    The 022 Tundra Stage 2 Turbo Kit usually comes with large twin turbos, typically sized between 62mm and 76mm. These larger turbos help boost airflow and power in the 5.7L V8 engine. A bigger turbo can push more air into the engine, which means more power, but it may take a little longer to respond when you hit the gas, known as “turbo lag.” It’s important to choose a turbo size that fits your performance goals while still being easy to drive every day.

    How Many Miles Per Gallon Does a Toyota Tundra 3.5 Twin-Turbo Get?

    The 2022 Toyota Tundra with a 3.5L twin-turbo V6 engine gets about 18 to 22 miles per gallon (MPG). This can change based on where you drive—highway driving usually gives better mileage than city driving. If you add a turbo kit, your gas mileage might change depending on how you drive. For example, driving aggressively can lower your MPG, while driving steadily can help improve it. Keeping an eye on how you drive can help you get the best fuel efficiency.

    How Much Horsepower Does the Tundra I-FORCE Twin-Turbo V6 Engine Make in the SR5 Grade?

    The Tundra I-FORCE twin-turbo V6 engine in the SR5 model produces about 389 horsepower and 479 lb-ft of torque. This engine offers a great mix of power and efficiency compared to older models. The twin turbos help the truck accelerate faster and deliver better torque, making it good for everyday driving as well as towing heavy loads. With its strong design, the I-FORCE engine is capable of handling tough jobs while still providing a smooth ride.

    Do You Need a Bigger Turbo for Stage 2?

    Yes, for a Stage 2 turbo kit, you generally need a bigger turbo to support the extra power and boost. A larger turbo can let more air flow into the engine, which is key for getting high performance. However, it’s important to make sure the truck is tuned properly and to add supporting upgrades like better cooling systems and fuel injectors. Bigger turbos can give you a lot more power, but they also need careful tuning to avoid problems like overheating or engine knocking.

    FAQs About the 022 Tundra Stage 2 Turbo Kit

    1. Can I install the Stage 2 Turbo Kit myself?

    It’s best to have a professional install the turbo kit because it can be complicated. A pro will make sure everything fits right and works properly.

    2. Will adding a turbo kit void my warranty?

    Yes, adding a turbo kit may void your warranty since most manufacturers don’t cover damage from aftermarket upgrades. Check with your dealer first.

    3. How often should I service my turbocharged engine?

    You should service your turbocharged engine regularly, just like any other engine. Check the oil levels and change the oil often to keep it running well.

    4. Can a turbo kit affect my vehicle’s reliability?

    Yes, a turbo kit can put more stress on your engine, which might affect reliability. It’s important to tune it properly and keep up with maintenance.

    5. Is the Stage 2 Turbo Kit suitable for off-roading?

    The Stage 2 Turbo Kit can improve power for off-roading, but you should also upgrade other parts like tires and suspension for better handling on rough terrain.

    Conclusion:

    The 022 Tundra Stage 2 Turbo Kit is an excellent upgrade for Toyota Tundra owners looking to boost their truck’s performance significantly. With the potential to add 100 to 200 horsepower, this kit enhances both power and torque, making it ideal for towing and off-roading. While installation is best left to professionals, the long-term benefits in performance and driving experience are well worth it. Just remember to maintain your engine and consider necessary upgrades to keep everything running smoothly. If you’re ready to take your Tundra to the next level, the Stage 2 Turbo Kit is a fantastic choice.

  • 2008 Toyota Tundra SR5 5.7L V8 Problems – Ultimate Guide For 5.7 Engine Failures!

    2008 Toyota Tundra SR5 5.7L V8 Problems – Ultimate Guide For 5.7 Engine Failures!

    The 2008 Toyota Tundra SR5 5.7L V8 Problems, including a ticking noise from a failed exhaust manifold, air injection pump failure, and oxygen sensor issues. Owners might also notice a loud vacuum cleaner noise on cold starts. Regular maintenance and addressing these issues promptly can help ensure the truck runs smoothly and reliably.

    What is the 2008 Toyota Tundra SR5 5.7L V8?

    The 2008 Toyota Tundra SR5 is a full-size pickup truck that stands out for its powerful 5.7L V8 engine. This model combines performance with comfort, making it suitable for both heavy-duty tasks and daily driving. It features a spacious cabin, good towing capacity, and a robust frame, allowing it to handle various workloads effectively. Its design is rugged, appealing to those who need a reliable truck for work or leisure activities.

    What Are the Common 2008 Toyota Tundra SR5 5.7L V8 Problems?

    Ticking Noise From Failed Exhaust Manifold:

    Some owners report a ticking noise, especially during cold starts, which may be caused by a failed exhaust manifold. This issue can lead to exhaust leaks, reduced performance, and increased noise levels. Addressing the problem early can prevent further damage.

    AIR Injection Pump Failure:

    The AIR (Air Injection Reaction) pump may fail, causing the Check Engine light to illuminate. This component helps reduce emissions by injecting air into the exhaust system. A failing pump can lead to decreased fuel efficiency and increased emissions.

    Oxygen Sensor May Fail:

    Oxygen sensors monitor the air-fuel mixture in the engine. A faulty oxygen sensor can cause poor fuel economy, increased emissions, and rough engine performance. Symptoms include a fluctuating idle or poor acceleration.

    Loud Vacuum Cleaner Noise on Cold Start:

    Some Tundra owners experience a loud noise resembling a vacuum cleaner when starting the vehicle, particularly in cold weather. This noise may be linked to the operation of the AIR pump or other components in the exhaust system.

    Excessive Oil Consumption:

    Reports of excessive oil consumption have surfaced, requiring drivers to check oil levels more frequently. This issue can lead to engine wear if not addressed promptly.

    Transmission Problems:

    Some owners have experienced hard shifting or slipping in the transmission, particularly when shifting from first to second gear. Regular maintenance and fluid changes can help mitigate this problem.

    Why and When Do These Problems Occur?

    These problems can arise due to various factors, including:

    • High Mileage: Issues tend to occur after the vehicle has reached high mileage, often above 100,000 miles. Components naturally wear out over time, leading to potential failures.
    • Harsh Driving Conditions: Frequently towing heavy loads, driving in extreme temperatures, or off-roading can accelerate wear on vehicle components.
    • Neglected Maintenance: Failing to follow a regular maintenance schedule can lead to significant issues, as parts may not receive the care they need to function properly.

    How to Identify These 2008 Toyota Tundra SR5 5.7L V8 Problems?

    Unusual Noises: 

    Listen for ticking, vacuum-like sounds, or any other strange noises during startup or while driving.

    Check Engine Light: 

    If this light turns on, it’s important to get a diagnostic scan to identify the underlying issue. It may indicate problems with the oxygen sensor or AIR pump.

    Poor Performance: 

    Noticeable drops in acceleration, fuel efficiency, or engine roughness can signal problems. If the vehicle feels sluggish, it might be time to investigate.

    Fluid Leaks: 

    Regularly check the area beneath the vehicle for oil or transmission fluid leaks. Any puddles should be inspected to determine the source of the leak.

    Which Solutions Are Available?

    If you encounter any of these issues, consider the following solutions:

    Regular Maintenance: 

    Stay on top of routine maintenance, including oil changes and fluid checks, to prevent many common problems. Following the manufacturer’s maintenance schedule is key.

    Professional Diagnostics: 

    If the Check Engine light comes on, using an OBD-II scanner or visiting a mechanic can help identify the specific issue quickly. Early diagnosis can save on repair costs.

    Component Replacement: 

    For specific issues like a failing AIR pump or oxygen sensor, purchasing and installing replacement parts can restore performance. Most of these parts are readily available at auto parts stores or through dealerships.

    Transmission Service: 

    Regularly servicing the transmission fluid can help prevent shifting problems and prolong the life of the transmission. It’s wise to consult the owner’s manual for the recommended intervals.

    What Should Owners Know About the 2008 Toyota Tundra SR5 5.7L V8 Problems?

    Current and prospective owners should be aware of common problems and take a proactive approach to vehicle care. Regular maintenance and prompt attention to any signs of issues can greatly enhance the Tundra’s longevity and performance. Additionally, being informed about the vehicle’s strengths and weaknesses helps in making informed decisions regarding repairs and upgrades.

    How to Prevent Future Issues?

    Preventative measures can help keep your Tundra in optimal condition:

    Routine Inspections: 

    Schedule regular inspections with a qualified mechanic to identify potential problems early. This includes checking brakes, tires, and suspension components.

    Fluid Changes: 

    Regularly change engine oil, transmission fluid, and differential fluids according to the manufacturer’s recommendations. Clean fluids help ensure the engine and transmission operate smoothly.

    Quality Parts: 

    Use high-quality replacement parts when repairs are necessary. Aftermarket parts may save money initially but could lead to further issues down the line if they are not reliable.

    Was 2008 a Good Year for Tundra?

    Overall, 2008 is considered a good year for the Toyota Tundra. It is recognized for its strong engine options and overall reliability. Although it has reported issues, many drivers appreciate the balance of power and comfort. Compared to earlier models, the 2008 Tundra offers improvements in performance and features, making it a solid choice for those seeking a dependable truck.

    How Many Miles Will a 2008 Toyota Tundra Last?

    With proper maintenance, a 2008 Toyota Tundra can last well over 200,000 miles. Many owners have reported that their trucks remain in good condition after reaching this milestone. Regular servicing and addressing minor issues early can significantly extend the lifespan of the vehicle.

    How Long Will the Toyota Tundra 5.7 Engine Last?

    The 5.7L V8 engine in the Toyota Tundra is known for its durability. With regular maintenance, it can last 200,000 miles or more. Many Tundra owners report that the engine continues to perform well even at high mileage, especially when cared for properly.

    What Year Was the Worst Year for Toyota Tundra?

    While experiences vary, some reports suggest that 2010 and 2014 had notable issues, particularly related to transmission problems and excessive rust. However, many owners still find these models reliable with proper care. It’s essential to research specific vehicles before purchasing to understand their history.

    What Was the Best Year for Tundra?

    Many enthusiasts consider 2007 and 2016 to be among the best years for the Toyota Tundra. These models are appreciated for their overall reliability, performance, and fewer reported issues. Owners often praise the build quality and engine options available during these years.

    Does a 2008 Toyota Tundra Have a Timing Belt or Chain?

    The 2008 Toyota Tundra 5.7L V8 engine uses a timing chain rather than a timing belt. Timing chains are generally more durable and require less frequent replacement than belts, making them advantageous for long-term maintenance. This design can contribute to the overall longevity of the engine, providing peace of mind for owners.

    Frequently Asked Questions:

    What is the towing capacity of the 2008 Toyota Tundra SR5 5.7L V8?

    The towing capacity is up to 10,600 pounds, making it great for hauling trailers, boats, or heavy loads.

    What kind of fuel does the 2008 Toyota Tundra use?

    It uses regular unleaded gasoline, which helps keep operating costs lower without sacrificing performance.

    Are there any recalls for the 2008 Toyota Tundra?

    Yes, there have been recalls, including issues with the brake system and seat belts. Owners should check for any active recalls.

    What is the average fuel economy of the 2008 Toyota Tundra SR5 5.7L V8?

    The average fuel economy is about 14 mpg in the city and 18 mpg on the highway, varying with driving conditions.

    How does the 2008 Toyota Tundra perform in snow and off-road conditions?

    It performs well in snow and off-road situations, especially with four-wheel drive, making it a reliable choice for tough terrains.

    Conclusion:

    The 2008 Toyota Tundra SR5 5.7L V8 is a robust and capable truck, but it does come with some common issues, such as ticking noises and sensor failures. Regular maintenance and early identification of problems can help keep it running smoothly. For owners, understanding these potential challenges is key to enjoying a reliable driving experience. If you’re considering purchasing this model, being aware of these problems will help you make an informed decision.

  • Dome Light In Tundra Will Not Turn Off – What’s The Reason!

    Dome Light In Tundra Will Not Turn Off – What’s The Reason!

    If the Dome Light In Tundra Will Not Turn Off, it’s usually due to one of a few common problems. This issue is often linked to door sensors, the dome light switch being in the wrong position, or a problem with the wiring. It can be a frustrating problem, especially because it can lead to draining your truck’s battery if it stays on for too long.

    What Are the Common Causes of a Dome Light Staying On in a Tundra?

    Faulty Door Sensors: 

    Each door has a sensor that signals when the door is open or closed. If one of these sensors isn’t working, the vehicle might think a door is open, even when it’s closed, keeping the dome light on.

    Dome Light Switch Set to “On”: 

    The dome light switch can be manually set to stay on. Sometimes, it’s accidentally left in the “On” position instead of “Door” or “Off.” This will keep the light on even if the doors are closed.

    Wiring Problems: 

    If there’s an issue with the wiring, like a short circuit or damaged wire, it might prevent the dome light from turning off. This is a less common cause but still possible.

    When Does the Dome Light in a Tundra Typically Stay On?

    The dome light usually stays on in these situations:

    • After a Door is Opened or Closed: When you open a door, the dome light comes on. If the door doesn’t close properly or a door sensor fails, the light might stay on.
    • Malfunctioning Timer: In many Tundra models, there’s a delay timer that keeps the dome light on for a few seconds after the doors close. If this timer malfunctions, the light might stay on much longer than it should.
    • Using the Key Fob: Sometimes, the dome light stays on for a short while after you lock or unlock the car using the key fob. If this light doesn’t go off, it could be a signal of a problem.

    Why Is the Dome Light Staying On a Problem in My Tundra?

    A dome light that stays on in your Toyota Tundra can lead to a few key problems. The most immediate issue is battery drainage, as the constant light can drain your battery if left on for too long. It might also signal electrical problems, such as a short circuit, which could affect other systems like your radio or headlights. Additionally, having the light on all the time can become an annoyance or distraction, especially when driving at night, making it harder to focus on the road.

    Dome Light In Tundra Will Not Turn Off
    Source: YouTube

    How Can I Troubleshoot a Dome Light That Won’t Turn Off?

    You can try the following troubleshooting steps to figure out why your dome light won’t turn off:

    Check the Door Sensors: 

    Make sure that all the doors, including the tailgate, are fully closed. You can manually press each door’s sensor to see if the light turns off when you do so. If one of the sensors doesn’t respond, it might be faulty.

    Inspect the Dome Light Switch: 

    Check the dome light switch inside your Tundra. It should be set to “Door” and not “On.” You can also try switching between all the positions to see if the light responds.

    Look for Wiring Problems: 

    Inspect the dome light area and the door frames for any visible wiring damage. If you find frayed or damaged wires, this could be the cause of the problem.

    Which Steps Can I Take to Fix the Dome Light Issue in My Tundra?

    If troubleshooting hasn’t solved the problem, you can try these steps to fix the issue:

    Close All Doors Completely: 

    Ensure that every door, including the tailgate, is completely closed. A door that’s just slightly open might cause the light to stay on. Sometimes, adjusting or cleaning the door latches can help.

    Reset the Dome Light Switch: 

    Turn the dome light switch between “On,” “Off,” and “Door” several times. Sometimes, the switch gets stuck or needs resetting, and this simple action might fix the problem.

    Check the Interior Light Fuse: 

    Find the fuse box (usually located under the dashboard or in the engine compartment) and check the fuse that controls the dome light. If the fuse is blown, replace it, and see if that solves the issue.

    What Should I Do if the Dome Light in My Tundra Won’t Turn Off After These Fixes?

    If none of the above fixes work, it’s best to:

    Visit a Mechanic: 

    A mechanic will be able to perform more in-depth testing to find out if there are any electrical issues in the truck’s system that are keeping the light on.

    Contact a Toyota Dealer: 

    If your Tundra is still under warranty or you’re dealing with a newer model, a Toyota dealer can diagnose and fix any more complex issues related to the dome light, including those tied to the vehicle’s computer system.

    Interior Lights Set to “DOOR” but Won’t Shut Off When Doors Are Shut:

    If your interior lights are set to “DOOR” but won’t shut off when the doors are closed, it may be due to an obstruction preventing the door from fully closing, like debris or a misplaced item. Additionally, each door has a switch that signals when it’s closed, and if one of these switches malfunctions, the light may remain on. To troubleshoot, check for any blockages in the door and manually press each door switch to see if the light turns off.

    Toyota Tundra – Why Won’t My Interior Lights Turn On/Off?

    If your interior lights won’t turn on or off, these might be the causes:

    • Blown Fuse: If the fuse responsible for the interior lights is blown, the lights won’t work. Check the fuse box for any blown fuses and replace them if necessary.
    • Broken Light Switch: The switch that controls the interior lights might be worn out or damaged. This can prevent the lights from responding when the doors open or close.
    • Loose Wiring: Inspect the wiring around the light switches. If any wires are loose, this could prevent the lights from functioning correctly.

    Can’t Find Vanity Light Fuse 2021 Tundra. What Is the Label?

    In the 2021 Toyota Tundra, the fuse that controls the vanity light is usually labeled as “DOME” or “INT LAMP” in the fuse box. You can check your vehicle’s manual or look at the fuse box diagram to locate this fuse. The fuse box is typically found under the dashboard or in the engine compartment.

    Frequently Asked Questions:

    Can a blown fuse cause the dome light in my Tundra to stay on? 

    Yes, if the fuse for the interior lights is faulty or blown, it can affect the dome light’s ability to turn off properly. However, a blown fuse usually causes the light not to work at all rather than staying on.

    Is there a way to manually turn off the dome light if it won’t go off automatically? 

    Yes, you can usually switch the dome light to the “Off” position using the light control switch, which will manually turn it off. If this doesn’t work, it could indicate a deeper electrical issue.

    Will disconnecting the battery help reset the dome light issue? 

    Disconnecting the battery might help reset the truck’s electrical system, which could fix the dome light issue temporarily. However, this isn’t a guaranteed long-term solution and the underlying problem should be diagnosed.

    Can cold weather affect the dome light staying on in a Tundra? 

    Extreme cold weather can sometimes cause issues with electrical components, including door sensors and switches, which may cause the dome light to stay on if the sensors malfunction due to freezing conditions.

    Does the dome light staying on affect other electrical systems in the Tundra? 

    While the dome light issue is typically isolated, it can sometimes signal broader electrical problems in the truck, such as with the battery, wiring, or even the vehicle’s computer system. It’s best to address it early to prevent other electrical malfunctions.

    Could a software update fix the dome light staying on in newer Tundra models? 

    In some cases, newer Tundra models with advanced electronics may experience issues that can be fixed by a software update. Check with your Toyota dealership to see if a software update is available for your vehicle.

    Can I replace the door sensor on my own if it’s causing the light to stay on? 

    Yes, it’s possible to replace a faulty door sensor yourself if you’re comfortable with basic car repairs. However, if you’re unsure or suspect there’s a more complicated issue, it’s best to have a professional handle it.

    Could a faulty key fob be related to the dome light staying on? 

    While it’s uncommon, a malfunctioning key fob might send incorrect signals to the vehicle, including keeping the dome light on. Try resetting the fob or replacing its battery to see if this resolves the issue.

    Final Thoughts:

    If the dome light in your Toyota Tundra won’t turn off, it could be due to issues like faulty door sensors, a stuck light switch, or wiring problems. These issues can lead to battery drain or indicate larger electrical problems. Simple troubleshooting steps like checking door sensors and resetting the light switch can often resolve the issue. If these fixes don’t work, seeking professional help is recommended to prevent further complications. Keeping your dome light functioning properly is essential to maintaining your Tundra’s performance.